When a pipe bursts, the tell-tale sheet in the under-sink cupboard is no help at all. What matters then is whether you can find the stop tap and turn it off in under a minute, and most people who rent have never gone looking for theirs. It is usually under the kitchen sink. Not always, though, and the middle of an emergency is a bad time to discover which sort of home you live in.
That gap is the reason for this piece. The last article was about spotting a slow drip early. This one is about the five minutes after a pipe gives way, which is a different problem and needs a different fix.
Why the tell-tale sheet is not enough on its own
Folded kitchen roll on the cupboard floor will pick up a weeping joint over days or weeks. It is no use when a supply pipe splits, when a washing machine hose pops off under pressure, or when a tap tail fails completely. Those leaks put out water by the litre, and a tell-tale never gets the chance to do anything. The only way to stop one is to shut the water off at the source, quickly, and that depends on already knowing where the stop tap is.
I hadn’t realised how much was at stake. Escape of water (meaning a leaking pipe or a faulty appliance, rather than flooding from outside) took the top spot for home insurance claims declared in 2024, at 28.63% of them. If you rent a flat, the claim is normally the landlord’s to make, not yours. Their policy won’t cover your own ruined things, though, or the days you spend without a kitchen that works.
Finding the inside stop valve, and testing it today
Look under the kitchen sink first, because that is where most stop taps are. If it isn’t there, Thames Water lists the other usual spots, and working down them in order seems sensible to me: an airing cupboard, under the stairs, under the floorboards, near the front door, or in a garage, utility room, bathroom or cellar. What you want is a small lever or wheel on the pipe just after it comes into the flat. If the valve has a screwdriver slot, it is probably one of the isolation valves under the sink, and those don’t control the main supply.
Turn it gently, once, to see whether it moves. Clockwise closes it. Thames Water’s page is honest that it may take a few turns to stop the water, and you’ll usually get to a point where you can’t turn it any further. Then turn it back anti-clockwise to open it. If it refuses to move, or it keeps turning and the flow never seems to stop, report it to the landlord straight away, the same as you would a seized isolation valve under the sink. Finding that out on an ordinary day is far better than finding it out while water comes through the ceiling of the flat downstairs.
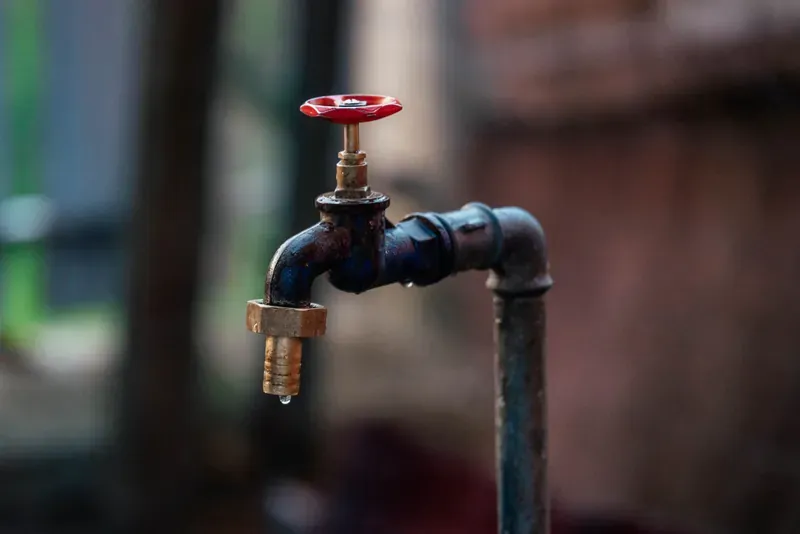 Photo: Andrei q via Pexels
What to do in the first five minutes of a proper leak
The Consumer Council for Water’s burst-pipe advice is short, and the order makes sense. First, turn off your water supply at the stop tap if you haven’t done so already, and make sure your central heating boiler or immersion heater is turned off. Next, turn on all the taps inside your home to reduce the risk of flooding, and use towels to soak up any water that has leaked. The point of opening the taps is to drain the water still sitting in the pipes above the stop tap, which would otherwise keep escaping even with the supply off. One step is easy to get the wrong way round. When the leak has been fixed, remember to turn the taps back off before you turn on the stop tap again, or the flat just fills back up.
I find it reassuring how simple this is. Four steps, always in the same order, and the only one that needs any skill is having found the stop tap beforehand.
The outside stop valve, and when you need it
There is a second valve outside. You need it when the leak is on the stretch of pipe between the inside valve and the street, or when the inside valve has seized. According to Thames Water it is normally located under a cover on the path or the road, usually near to the boundary of your home, and if there is a water meter it will generally be in the same pit or chamber as the meter. This one also closes clockwise. You might need a valve key or a universal stopcock key from a hardware shop, since those covers were designed to keep out dirt and traffic, and being easy to open was not the priority.
I’d treat the outside valve as the backup. It is stiffer, it often needs a tool, and in a converted building you share it with the flats next door. Try the inside valve first, and only go outside if that fails or the leak is obviously upstream of it.
Telling the rest of the house where it is
In a shared house, whoever spots the leak probably won’t be the person who read this. Finding the stop tap once and telling everyone where it is, or sticking a note inside the cupboard door, costs nothing, and it means the fix doesn’t depend on who happens to be home. It is the same in a flat shared with a partner: if both of you know where it is, the water goes off twice as fast as when only one of you does.
After the water’s off
When the leak is under control, go back to the process in the tenancy admin piece: photograph the damage, email the landlord rather than just ringing, and keep a copy. Who does the repair is still the same question it always was. Shelter’s guidance says the landlord is always responsible for pipes and plumbing, even if the tenancy agreement does not say so. Finding the stop tap and turning it off is the one part of a burst pipe that is down to you, and how quickly you manage it decides how big the rest of that conversation becomes. Everything else behind this, filed and dated, is in the organisation section.